SharePoint site security levels are assigned to Groups/Users. Users are added in different groups and each group is assigned security levels. Security levels are
assigned by the administrator who is adding the user. There are four levels by
default.
* Full Control - Has full control.
* Design - Can view, add, update, delete, approve, and customize.
* Contributor - Can add content to existing document libraries and lists.
* Read - Can view pages and list items and download documents.
* View Only - Can view pages, list items, and documents. Document types with server-side file handlers can be viewed in the browser but not downloaded.
To add Groups in SharePoint site follow the following steps:
1. Go to your site and login with administrator. From Site Action choose Site Settings.
2. From Users and Permissions select Site Permissions and from ribbon click on Create Group.
3. Give a name to user Group and choose the permission level. Click on save button.
If you want to change the permission level of existing Group, choose Grant Permissions in Step-2 and follow the following image and choose the permission level.
Add Users In Groups
4. Go to Site Action and Site Settings as in Step-1
5. From Users and Permissions select People and Groups and from left panel choose your Group in which you want to add users.Click on New->Add Users.
6. From pop-up window insert user name and check for existence. If user exists click OK button.
When you enable anonymous access to a Web site, you allow anonymous users (and authenticated users who have not been granted access to the site) to browse the entire Web site, including any list, library, folder within a list or library, list item, or document that inherits its permissions from the Web site. If anonymous access has been enabled by the server administrator, members of the Site name Owners SharePoint group can do the following:
·1. Grant anonymous access on a site.
·2. Grant anonymous access only on lists and libraries.
·3. Block anonymous access on a site.
If you want to enable Anonymous Access enable to your site or sub sites, you have to first enable Anonymous Access to your top level site. Sub sites inherit top level permissions or you can change permission settings.
To enable Anonymous Access on your top level site. Here are some points.....
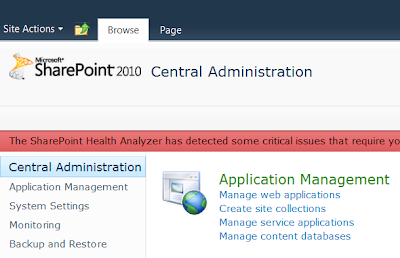
1. Open your Central Administration. From Application Management select Manage Web Applications.
If anonymous access is not enabled you can not check/uncheck Anonymous User Policy from ribbon.
2. Click on Authentication Providers and change the default provider setting by clicking Default Authentication Providers. Edit Authentication and check Enable anonymous access and click save button.
3. Now click on Anonymous Policy from ribbon.
Now you are able to change the anonymous policy from pop-up window
click on save button to save changes.
4. Now go to your top level share point site . Click on Site Action button and select Site Settings option and from settings page click Site Permissions.
5. Anonymous Access button will be not visible in ribbon. To show Anonymous Access button click Stop Inheriting Permissions.
6. Now from user page ribbon click Anonymous Access button. If Anonymous Access is not enabled from central administration, this is not enabled.
from pop-up window you can give access to anonymous users. Click OK to save changes.
now the access permission will be displayed in the access list.
7. Now logged out from this site and open again the site. You will see that, it will not ask for login.
it is quite easy to add your own Ribbon controls and tabs to existing lists, libraries, and even your own web parts. You can even add contextual ribbon tabs to web parts hosted in your own custom Application Pages.
open VS2010 and create an Empty SharePoint Project.Add a reference to the Microsoft.Web.CommandUI assembly.Now right-clicking the project,choose Add,new item and select Application Page. This will get created as Layouts//.In code behiend file Create the ribbon by declaring two strings that hold the Tab and the GroupTemplate definitions like this:
Now add add tabs,groups and their functionality.
The code, though a little long, is actually quite simple and can be reused almost completely for any number of ribbons. The first function simply adds the display of the ribbon while the second registers the JavaScript to call when the respective buttons’ click commands are called.
protectedoverridevoid OnPreRender(EventArgs e)
{
base.OnPreRender(e);
this.AddRibbonTab();
AddTabEvents();
}
privatevoid AddRibbonTab()
{
// Gets the current instance of the ribbon on the page.
SPRibbon ribbon = SPRibbon.GetCurrent(this.Page);
//Prepares an XmlDocument object used to load the ribbon
XmlDocument ribbonExtensions = newXmlDocument();
//Load the contextual tab XML and register the ribbon.
The Ribbon button event handling requires some extra JavaScript as well that is loaded within another .JS file. To do this, simply add a new JavaScript file in your // folder and call it PageComponent.js. This is what it’ll look like.